
In our previous post, we went back to basics, taking a detailed look at where it all begins: the humble cocoa bean. If you haven’t read that one, have a look, and see why this tiny seed (yes, it is a seed!) can pack a mighty flavour-punch.
We’ll assume you’ve done that.
So now you know about the importance of starting with a top-quality ingredient, the meticulous process of chocolate-making can begin…
Hand Sorting
We hand sort every single tray of cocoa beans that we roast.
Every. Single. Tray.
That means that for each batch of our chocolate we are sorting through 30-45kg of beans (depending on the percentage of the chocolate we’re making).
Checking for impurities in this way is a time-consuming process, but it’s this attention to detail that is crucial to creating a quality chocolate.
So, when the sacks of beans arrive at our workshop, the first thing we have to do before turning them into chocolate is to go through them with a fine-tooth comb. (Actually, the first thing we do is lug them from the delivery pallet to our storage area - feeling strong, anyone?)
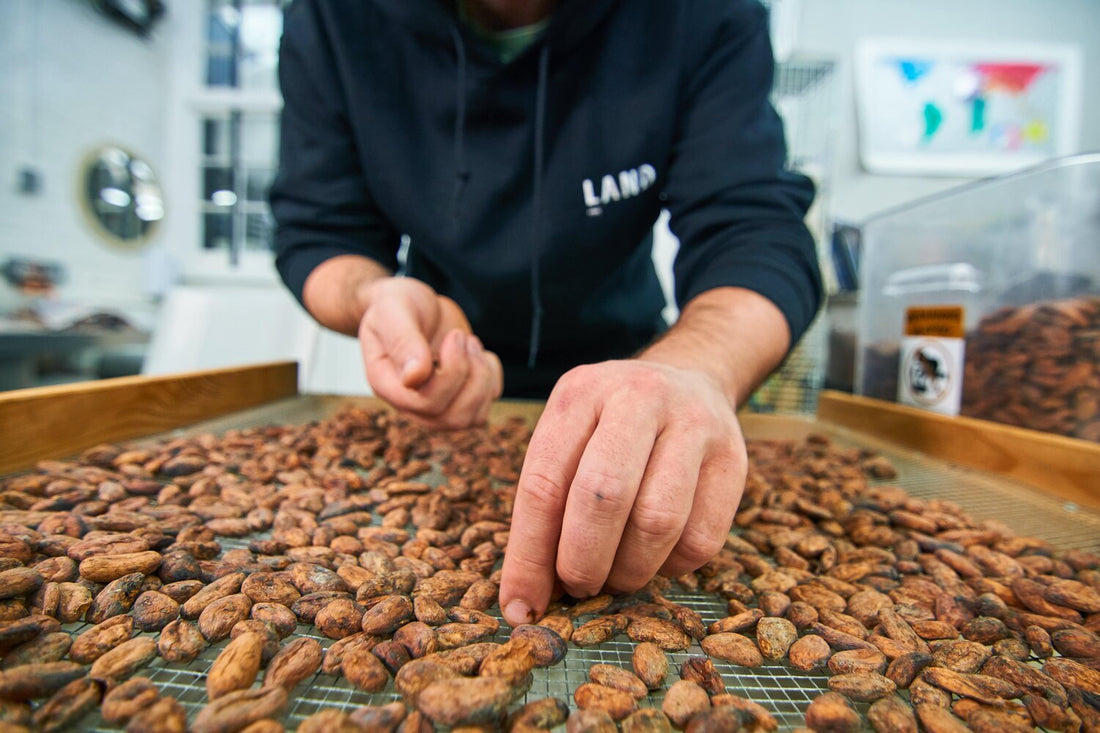
Because a fine-tooth comb would be impractical, we sort the beans using a home-made piece of kit that Phil put together with his Dad - a raised wooden frame, covered in chicken wire to create a grid shape (see top pic). Simple, but very effective.
The smaller impurities fall through the gaps in the wire while the grid shape makes it easier to scan the beans and pick out anything that doesn’t look right. We check every bean that goes into our chocolate this way.


What to look for
Foreign materials - this includes small stones, sticks, screws, even dead bugs….I know, gross. These beans have come straight from a rural farm and it’s always surprising what can creep into a bag of cocoa beans. Some varieties of cocoa bean present a bigger challenge than others. The lighter colour of the Venezuelan Puerto Cabello bean, for example, makes it much harder to spot the tiny stones that can find their way into the sacks.Spoiled beans - this means mouldy beans, slate coloured beans (meaning they haven’t been fermented properly), and flat beans with nothing inside them. These can impair the flavour of your chocolate so you want to remove as much as you can. It’s a tricky job, but a dab hand can sort through 20kg in around 30 minutes.
Hand sorting is a crucial phase of the bean-to-bar process that requires an eagle-eye and a strong back. But as you can see, there’s always room for a creative flair:

Once we’ve removed the impurities and trayed up, it’s on to the next phase of the process where the creative science of bean-to-bar chocolate really begins...
The Roast
Reasons to roast:
-
Sanitise the bean - potentially harmful microbes can contaminate the cocoa beans before they leave the farm. Roasting ensures a product which is safe for human consumption.
-
Reduce moisture and help separate the shell of the bean from the cocoa nib. This will help with the winnowing process which we will talk about in Part 3.
-
Develop flavour - Several chemical reactions happen during the roast, opening up the wide spectrum of natural flavours that live within the bean.
There are no set rules when it comes to roasting and developing flavour, but here’s our quick guide:

A good starting point is to roast a tray of beans for 20mins at 140C, preferably on a perforated aluminium tray (NB we oven roast at Land, but there are alternative methods such as drum roasting).
From that first roast, you can make adjustments to time and temperature to suit your own preferences. Be careful, it’s surprising how much 5 minutes can change a roasting profile - under developed cocoa can taste vinegary whilst over roasted cocoa can taste burnt and smoky.
If you start to smell brownies during your roast, you’re well on your way! Hearing a slight popping sound means you’re nearing the end of the roast - the popping sound is pockets of air escaping from the beans.
Once you’ve found the perfect roasting profile for your bean, you’ll be one step closer to making an incredible chocolate. But beware - your roasting profile may be perfect for one variety of bean, but disastrous for another. Every bean variety has it’s own distinct personality so you will have to find a different roasting profile to match each one. Get ready for a lot of trial and error.
Roasting drives off volatile acids from the beans and converts amino acids and sugars into more fully formed flavour compounds through the Maillard reaction (browning process). In other words, roasting develops the more appetising flavours we associate with chocolate.
The next part of the process combines ancient methods with modern technology - let’s get cracking…
P.S. If you’d like to know more about the roasting process, John Nanci’s Chocolate Alchemy has some next-level chocolate science.